In the article on Topical Herbal Preparations, I promised that there would be a detailed account of how to make really amazing herbal oils; so here we are. In Western Herbalism, herbal oil on its own is usually used to rub into sore muscles, to hydrate and/or repair the skin, or as a surface pack over an organ, a cyst or other painful area.
In Ayurveda, there’s a long and far more colourful history of using herbal oils, lots and lots and lots of them, applied over and within pretty much all parts of the body. Techniques include external body oleation or snehana, oil-flow head massage or shirodhara, nasal oleation or nasya, and enema or basti which is often oil-based.
Oils are also the major ingredient in most salves, unguents, creams and balms both medicinal and cosmetic. Besides this, they can be a tasty addition to a variety of cooked dishes. Infusing oils with the herbal properties of the rich flora around us can help bring healing, spirit and spice to the products we use daily.
Creating herbal oils is thus a foundational technique of chefs, kitchen witches, home herb dabblers and professional herbalists alike. Even if ultimately we choose to purchase oils crafted by someone else, knowing how they are made and trying our own hand at it allows us to understand the process and discern quality from crap.
If you aren’t ever going to make an herbal oil for yourself and won’t read through to the end of the technique section (which I’ll give you is quite repetitive) but still want to know the good from the bad then here’s a short list of what to look for:
1 – An ‘’herb-y’’ smell: Although most herbal oils won’t have a very strong smell, they should have a good green scent. Some herbs like eucalyptus, rosemary and chaparral will definitely yield a pronounced odour – for better or for worse.
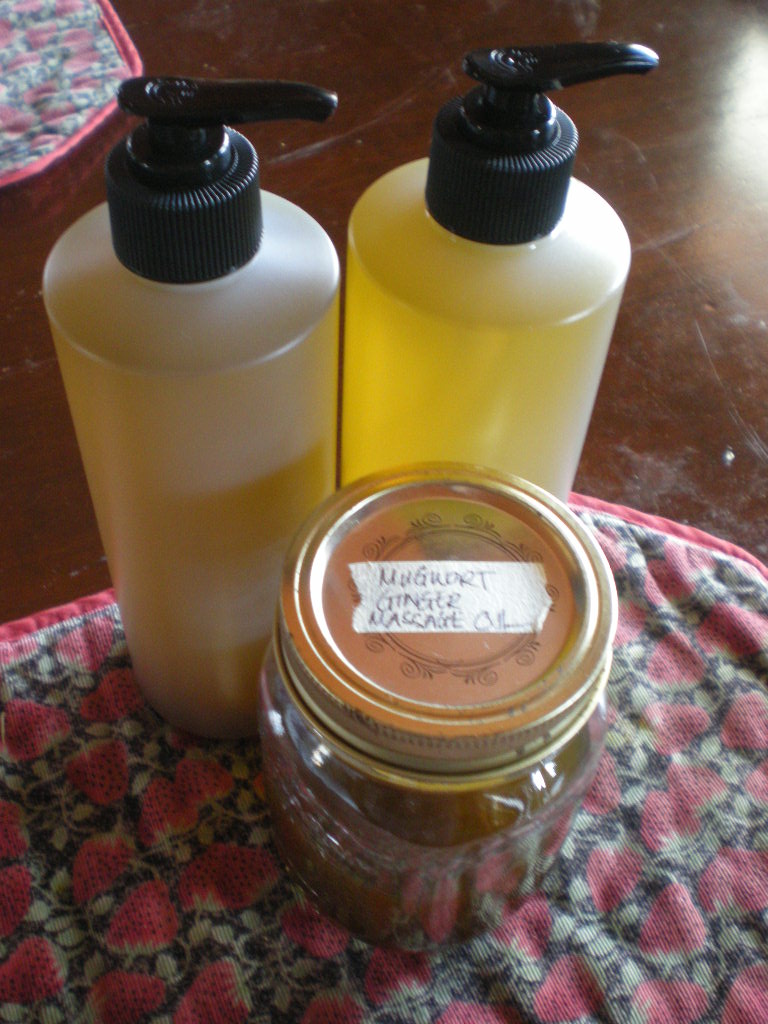
2 – A good colour: Most herbs used in oil infusions change the colour of the vehicle following a successful steeping process. For example, if you’re buying mullein flower oil it should be bright yellow, fresh chickweed oil is a medium green, while good quality St-John’s wort oil will be a deep red.
3 – Small batches of hand-made oil: As long as the maker of the oil works with care, generally smaller batches made by hand are of better quality than mass-produced or machine-made oils. It is also more likely that such a manufacturer will work with fresher herbs.
For those who are going to give the whole oil-making thing a whirl, you’ll need to decide on what type of oil you’ll be infusing. The base oil used will determine some of the basic qualities of how the finished product will affect the skin. Picking one (or a combination of them) to work with can be a bit confusing. Here are the most common oils used as vehicles and what they’re usually used for:
1 – Olive oil: By far the most common base oil in Western and European herbalism. It’s an excellent emollient and can be used for soap-making and salve-making. It’s a bit heavy/sticky for use in cosmetic creams or as massage oil.
2 – Castor oil: The most moisturizing and viscous of the oils, it has many healing virtues when used alone (you can check that out here). When used in herbal infusions, it’s usually a small percentage of a combined oil as its texture isn’t very practical to be infusing solo.
3 – Almond oil: A great choice for herbal oils destined to finish their lives as lip balms, cosmetic creams or extra-moisturizing massage oils.
4 – Apricot kernel oil: Another great choice for herbal oils destined to finish their lives as lip balms, cosmetic creams or extra-moisturizing massage oils. Easier on sensitive skins that almond oil.
5 – Rice bran oil: My personal favourite for use as massage oil, it’s light and doesn’t leave a greasy or sticky feeling on the skin. In cold-process soap-making, while it melts pretty quick as a finished bar, it does give things a lovely satiny sheen.
6 – Sesame: The oil of choice in Ayurveda. It’s used alone in many cases and is infused with medicinals as required. It has the advantage of calming Vata dosha making it excellent in windy climates or when winter is dry and blustery. It has the disadvantage of leaving you smelling a bit like a stir-fry after using it.
7 – Coconut: The second most common base oil used in Ayurveda. A cooling oil, it is usually used in the summer or for those with a fiery (Pitta) disposition.
Once you’ve decided on the oil and then on the herbs, it’s time to put it all together. Three different techniques to make herbal oil will be discussed below: fresh herb oils, dry herb oils and Ayurvedic herbal oils. Each of these techniques can be used as a single infusion or for multiple infusions. A single infusion means that the oil is steeped with herbs only once. A multiple infusion means that the same oil is steeped with new herbs two or more times in order to yield stronger finished product.
When working with multiple infusions, less oil will be produced for a given starting volume seeing as some of the oil is lost in each successive straining operation. This coupled with the greater amount of plant matter used increases the overall cost of production; so does the extra amount of time devoted to each finished batch. Yet all these factors are also what make double or triple infused oils so much more special than their single-steeped counterparts.
It is also possible to combine techniques over different infusions. A first infusion with fresh herb could be done, followed by a second infusion with dried herb. (Word to the wise: always do the fresh herb infusions first as these are the trickier ones where the possibility of losing your work to the Demon of Rot exists. There will be more about this in the section on fresh herb oils.)
For Ayurvedic oils, although you could do multiple infusions, the technique to make them is so time-consuming that it would probably be an exercise best reserved for the herbal masochist amongst us.
In any of the methods of herbal oil-making (except for the Ayurvedic method), measuring the amount of ingredients you use is strictly optional. It is useful to measure when you’re going to be selling the products you make since in that case you’ll want to be able to reproduce a recipe exactly and price it precisely. If the wares you’re creating are for home use however, then the eyeball method (or Simpler’s method if you want the proper term) will do just fine. The eyeball method basically says to make sure that the herbal matter used is completely covered with oil by at least two to three inches (2’’-3’’).
Fresh Herb Oils: are herbal oils made by steeping fresh plant matter in a base oil. To make them you’ll need the following, although not all at the same time:
- Glass jar
- Fresh herbs
- Base oil
- Blender (optional)
- Stainless steel double boiler set-up (optional; if you go this route, you can forego the glass jar, see step 3, option C)
- Cheese-cloth
- Metal strainer
- Collection container (that will hold the strainer)
- Storage container (perfectly dry)
- Nitrile or latex kitchen or medical gloves (optional, if you don’t want oily hands while you work)
1 – Begin by collecting the fresh plant matter that you’ll be using in your oil. Leave them in a shady place for a while until they wilt and any of the insects housed within them have vacated the premises.
2, option A – Mince the plant matter as finely as possible and add it to the glass jar. Add oil to completely cover the herbs by at least a couple of inches, more if desired. Cover the jar with a clean coffee filter or cloth and secure in place with an elastic band (this allows excess moisture to evaporate and helps keep the oil from rotting).
2, option B – Chop the plant matter into small pieces and add it to the blender. Add enough oil to cover the herbs by at least a couple of inches, more if desired. Blend the plants and oil at high speed for about five minutes until everything is broken up into tiny pieces and the mixture looks a lot like salad dressing. You’ll probably have to take breaks as you do this to let the blender cool down. Pour the mixture into the glass jar. Cover the jar with a clean coffee filter or cloth and secure in place with an elastic band (this allows excess moisture to evaporate and helps keep the oil from rotting).
2, option C – Call me sensitive, but when it comes to delicate floral matter like rose, mullein flower and St-John’s Wort, I can’t bring myself to blender the poor babies. Slightly crushed and wilted they infuse fine, or if it’s something a bit heartier like calendula, coarsely chopped works too. Continue as in option A thereafter.
3, option A – Place the jar in direct sunlight, preferably outdoors, every day for a couple of weeks or so. The heat of the sun will infuse the herbs into the oil while adding its own variety of brightness to the mix. Although the longest of the three infusion methods, it does yield a particularly magical final product worth the time required. Solar infusion is particularly appropriate to oils made with fresh flowers such as calendula, mullein and St-John’s wort.
3, option B – Turn on the oven to its lowest possible setting, usually 170-190F and place the glass jar inside for a few hours. Repeat every day for about a week. Make sure not to accidentally leave the jar in the oven and then start dinner, you’ll boil your oil and have deep-fried herbs which aren’t what you want – I speak from experience here in case you’re curious.
3, option C – Place the oils and herbs in the top section of a double boiler rather than a glass jar when you’re at step 2. Fill the bottom of the double boiler with water. Heat, keeping the oil covered, until the water below is simmering. Let simmer several hours (the longer the better), making sure that there is always water in the bottom section and that the water is simmering, not at a rolling boil.
4 – Place the metal strainer over a collection container and line it with two (2) or three (3) layers of cheese-cloth. The cheese-cloth should hang over the edges quite a bit so you can easily remove it from the strainer later.
5 – Pour the oil and plant matter into the cheese-cloth/strainer and let it sit an hour or two until all of the oil is released. DO NOT PRESS THE HERBAL MATTER LEFT OVER since it contains residual water that you do not want in your finished oil. Compost the herbs and cheese-cloth.
6 – If the collection container isn’t your final storage container, then transfer or bottle as required.
7 – If you think there may be excess water in your oil (probable if you made chickweed oil for instance) and you didn’t use option B back in step 3, then you may want to place the finished product in an uncovered oven-safe container and heat at the lowest possible setting, usually 170-190F, for a few hours. This will help to evaporate any moisture that could cause the oil to go bad.
NB – If after infusion or following storage the oil smells kind of ”off” or has fuzzy growths, it’s probably been attacked by the Rot Demon. Do not pass go, do not collect any finished oil, send it to the compost heap and start over.
Dried Herb Oils: are herbal oils made by steeping dried plant matter in a base oil. To make them you’ll need the following:
- Glass jar
- Dried herbs (cut and sifted or powdered)
- Apple cider vinegar or 80 proof (or more proof) alcohol
- Base oil
- Coffee grinder (optional)
- Blender (optional)
- Stainless steel double boiler set-up (optional; if you go this route, you can forego the glass jar, see step 4, option C)
- Cheese-cloth
- Metal strainer
- Collection container (that will hold the strainer)
- Potato ricer (optional)
- Storage container (perfectly dry)
- Nitrile or latex kitchen or medical gloves (optional, if you don’t want oily hands while you work)
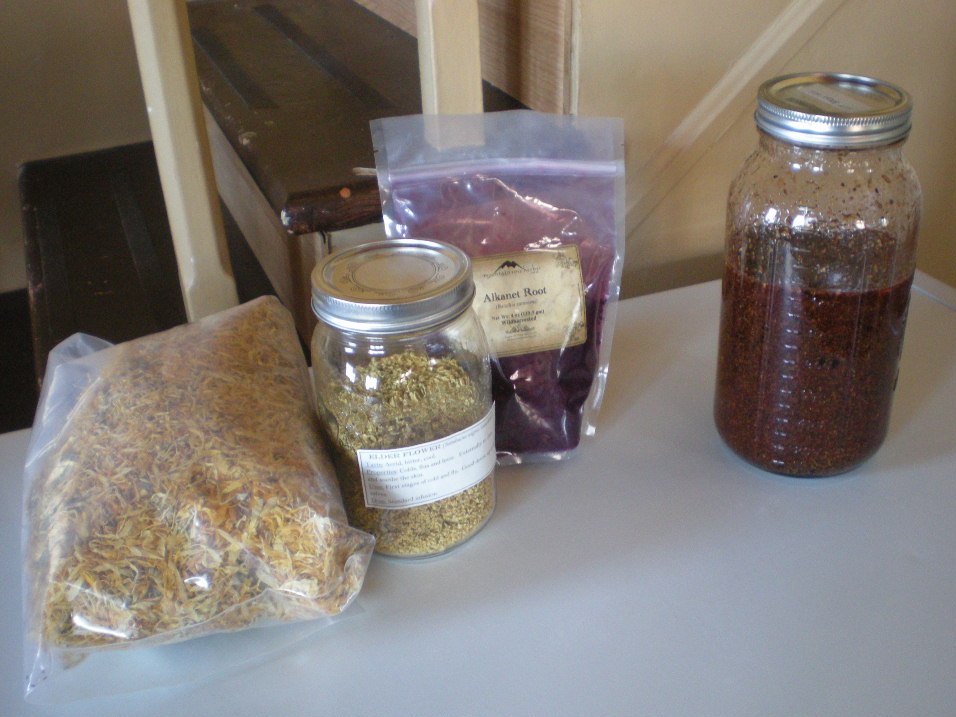
1 – Begin by deciding what herbs you’ll be using in your oil. A single herb or a combination of herbs can be used. Although you can leave the herbs cut and sifted, the greater the surface area of herb provided to the oil, the stronger the final product, therefore I recommend grinding the herbs down to a powder using a coffee grinder or buying them pre-powdered if it’s feasible. NOTE – If you go the coffee grinder route, make sure that you have one dedicated to herbs or your coffee will forever have a funky taste to it…
2 – To each cup of herbal matter, add a teaspoon of apple cider vinegar or alcohol. Mix well using your fingers to distribute the liquid evenly throughout the herbs. Cover and let sit for a while. (The alcohol or vinegar helps more actively draw out the medicinal properties of the herbs than would the oil alone.)
3 – Add the herbs to the jar (if they aren’t there already) and then the oil to completely cover the herbs by at least a couple of inches, more if desired. Close the lid finger-tight, no need to give yourself a hassle opening it.
4, option A – Place the jar in direct sunlight, preferably outdoors, every day for a couple of weeks or so. Shake daily. The heat of the sun will infuse the herbs into the oil.
4, option B – Turn on the oven to its lowest possible setting, usually 170-190F and place the glass jar inside for a few hours. Repeat every day for about a week. When working with dried herbs, this is a particularly good method when a quality oil is desired in a reasonable amount of time.
4, option C – Place the oils and herbs in the top section of a double boiler rather than a glass jar when you’re at step 3. Fill the bottom of the double boiler with water. Heat, keeping the oil covered, until the water below is simmering. Let simmer several hours (the longer the better), making sure that there is always water in the bottom section and that the water is simmering, not at a rolling boil.
5 – Place the metal strainer over a collection container and line it with two (2) or three (3) layers of cheese-cloth. The cheese-cloth should hang over the edges quite a bit so you can easily remove it from the strainer later.
6 – Pour the oil and plant matter into the cheese-cloth/strainer and once most of the oil has passed through, draw up the edges of the cheese-cloth to make a bundle. Twist and squeeze the bundle to release as much oil as you can. If desired, transfer the bundle to a potato ricer to help get as much of the good stuff as realistically possible. Compost the herbs and cheese-cloth.
7 – If the collection container isn’t your final storage container, then transfer or bottle as required.
Ayurvedic Herb Oils: are herbal oils made by one of the longest and most detailed methods I have ever come across. To make them you’ll need the following, along with a wellspring of patience:
- Herbs (dried or fresh)
- Water
- Base oil
- Thick-bottomed stainless steel or enameled cast iron pot or pan
- Blender
- Cheese-cloth
- Metal strainer
- Collection container (that will hold the strainer)
- Potato ricer (optional)
- Storage container
1 – Begin by deciding what herbs you’ll be using in your oil. A single herb or a combination of herbs can be used.
2 – To each ounce of herbal matter, add 16 ounces of water. Simmer in the pot or pan until only four ounces of water remain.
3 – Let this tea come to room temperature and place it in the blender to reduce herb and water to a homogeneous paste.
4 – Add this paste back to the pot or pan and combine it with a pint of oil (usually sesame or coconut).
5 – Heat gently and stir constantly (or at least pretty regularly) until all of the water evaporates and the herbs are crisp. This will take several hours.
6 – Place the metal strainer over a collection container and line it with two (2) or three (3) layers of cheese-cloth. The cheese-cloth should hang over the edges quite a bit so you can easily remove it from the strainer later.
7 – Pour the oil and plant matter into the cheese-cloth/strainer and once most of the oil has passed through, draw up the edges of the cheese-cloth to make a bundle. Twist and squeeze the bundle to release as much oil as you can. If desired, transfer the bundle to a potato ricer to help get as much of the good stuff as realistically possible. Compost the marc and cheese-cloth.
8 – If the collection container isn’t your final storage container, then transfer or bottle as required.
So there you have it: if there are any details that aren’t clear, feel free to comment and I’ll elucidate to the best of my ability.
