This recipe is heavily influenced by Kolokythopita, a Greek winter squash pie. Think the better known Spanakopita, but made with squash instead. Typically, it’s made with eggs and feta and butter. Not eating any of those, this is my vegan take on the classic – with chickpeas standing in for the animal-based proteins and adding a bit of substance to the veg. It’s just as satisfying as the original: sweet, savory, flaky, tender, all the good stuff – but it requires less and more affordable ingredients! (Beans being cheaper than animal goods and all.) It’s also really quick to make (for a layered pie), about an hour from start to finish, (if your beans and squash are already cooked and hanging out in the fridge). Enough parentheses, more recipe.
Yield: an 8×8 pan
What you need:
- 1 onion, finely diced
- lots of fresh chopped herbs, about 3/4 cup to 1 cup’s worth, or more if you want. I like a mix of dill and parsley, but you could work with cilantro and basil for a less Greek and more Italian kind of flavor. A bit of fresh oregano could work too. Experiment! Have fun!
- 2 teaspoons of olive oil, to sauté the onion
- 1-1/2 cups cooked chickpeas (or 1 can, well-rinsed)
- 1/4 cup white wine (or unsalted vegetable stock if you don’t use alcohol)
- 2 tablespoons ume plum vinegar
- 2 cups cooked and coarsely mashed roasted winter squash, something sweet like Kabocha or Red Kuri is best, but butternut works too (either oven-roasted or BBQd is fine. BBQ will give you an incomparable smoky taste you can’t get otherwise though)
- 1/4 cup of olive oil (or a bit less, or a bit more), to brush the phyllo pastry
- 6 sheets of phyllo pastry (or more if you want more layers of flaky goodness – but you’ll also have to increase the olive oil accordingly)
What you do:
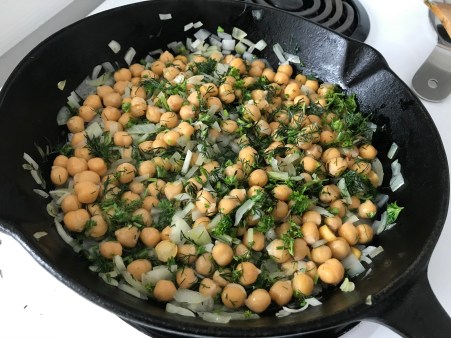
- Heat a cast iron or heavy bottomed pan on medium heat. When hot, add the oil and diced onion. Sauté until the onion is soft and translucent. Be careful to keep it white, so watch the heat, turning it down as necessary.
- Add the chickpeas, fresh herbs, wine and ume plum vinegar to the pan. Stir to mix well and bring the liquid to a boil, it won’t take long. Cover, bring the heat to low and let simmer for 10 minutes.
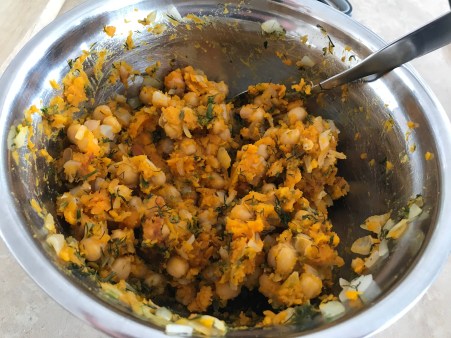
- While the chickpeas, onions and herbs are cooking, place the roasted and mashed squash into a bowl. You’ll probably have some time left to do a bit of vacuuming, disinfect the doorknobs or start a load of laundry.
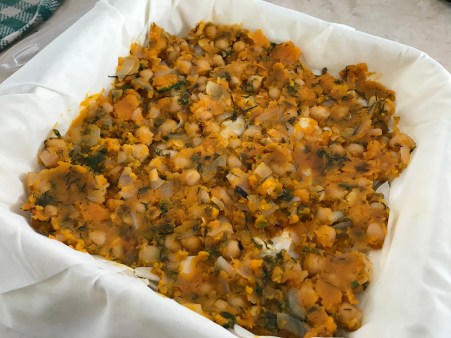
- When the chickpeas are done, transfer them along with any cooking liquid to the bowl with the squash. Mix well to form a thick and sticky filling that smells and tastes like heaven. Sample it, and adjust spice (read salt and pepper) as desired.
- Preheat the oven to 350F.
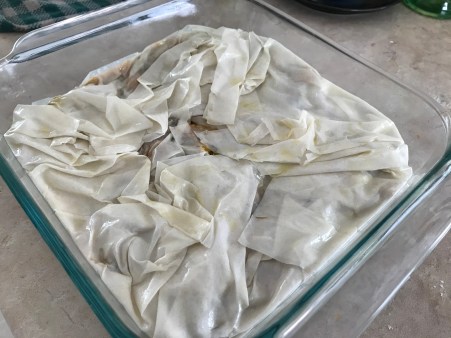
- Now the phyllo part. If you aren’t used to working with the stuff, it can be a bit tricky. There’s good tutorials on the ins and outs of phyllo artistry here and here. Start by setting up your station with the 8×8 pan in the middle. Above, lay out a small bowl with the olive oil and a brush. To the left (or right if you’re left-handed), keep the phyllo, and on the right (or left if you’re a lefty), the bowl of filling. Brush the bottom and sides of the pan with oil and lay a sheet of phyllo on top. Brush more oil, and another sheet. More oil. More sheet. Repeat until all the sheets are used up and drape over the edge of the pan, rotating as required to get an even overhang all around.
- Place 2/3 of the filling in the pan, over the pastry. Press it down into a loose but even layer.
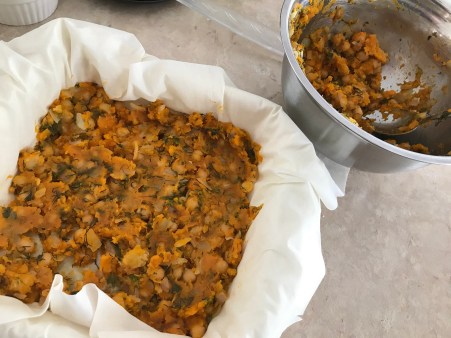
- Fold half of the overhanging layers on top of the filling and brush with oil again.
- Lay the last third of the filling on top. Another even, but thinner layer this time.
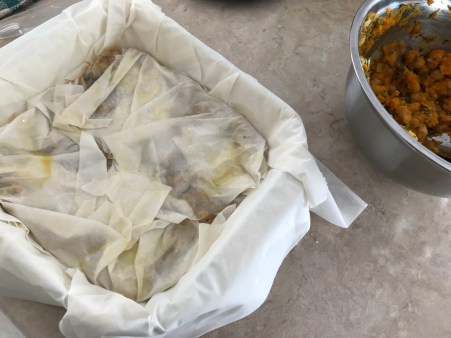
- Fold what remains of the overhanging phyllo dough on top of the pie and brush with oil again.
- Bake the pie in the oven until as golden as you like it: 30-45 minutes depending on your oven and how hungry you are.
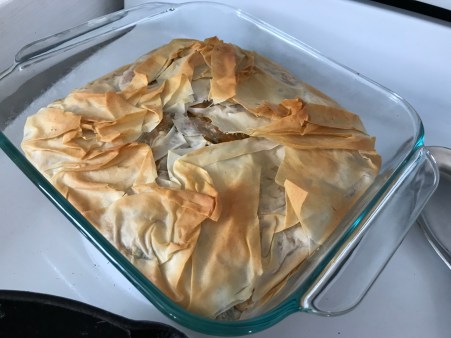
- Slice and serve. Salad makes a nice side.
